How to use ChatGPT in Power BI
ChatGPT has many uses for improving productiveness and efficiency as a data professional. With use-cases ranging from actual development assistance like code recommendations, troubleshooting & formatting to softer use-cases like writing documentation, outlining project plans, creating learning syllabus or even a personal tutor.
But, how about using it to enrich data directly inside Power BI?
Or to summarize entire columns of data, or even tables?
Today I will share a guide on how to send ChatGPT prompts inside Power Query scripts and save the data right back as new columns into your actual data.
This blog post will contain the following elements:
How to set up and generate an Open AI API key
How to connect to the ChatGPT API inside Power Query
A ready-to-use function that takes a text input as a prompt to ChatGPT, and returns the response as a text output.
A few initial ideas for ChatGPT use-cases in your data, and a discussion about its limitations
Getting an API key for Open AI
The first step on the journey is getting an API key to Open AI which let’s you call the engine beneath ChatGPT programmatically. To set up an API key of your own, follow these steps (as of May 5th 2023):
Go to platform.openai.com
Create an accout, confirm your e-mail, add account details and confirm your phone number
Click on the profile in the top-left then “View API keys”
Generate an API key (+ Create new secret key)
Copy the key. For security reasons, you won't be able to view it again through your OpenAI account.
If you lose this secret key, you'll need to generate a new one.
Caution!
Using the API is a paid offering. You may receive enough free credits to get started. Furthermore, the service allows for setting up maximum spending limits as well as soft limits for alerts.
Connecting to ChatGPT in Power Query
With the API key in hand we are ready to continue with the second part of the journey.
In this step we will utilize the ChatGPT function below, based on the API documentation.
🔗 Chat API documentation
If you wish you can switch out the API endpoint for the Completion API endpoints and one of the other models. Be aware of different pricing depending on the chosen model. “gpt-3.5-turbo” is the model used for ChatGPT.
🔗 Pricing (openai.com)
How-to:
Copy the function below
Go to Power Query via “Transform Data”
Create a new blank query, paste the function into the “Advanced Editor”
Replace the text "INSERT API KEY HERE" with your own API key
(e.g. like this "sk-5nEAGEHxZ2QqhUUpIQT3BlbkFJyMx0Tl9bbjKnYDLDlo01")Optionally, give it a test drive by writing a prompt to ChatGPT and invoking the function
Continue below to see how to use it on actual data
ChatGPT function
let
    Output = (prompt as text) as text =>
    let
        url = "https://api.openai.com/v1/chat/completions",
        apiKey = "INSERT API KEY HERE",
        headers = [
            #"Content-Type" = "application/json",
            #"Authorization" = "Bearer " & apiKey
        ],
        body = Json.FromValue([model = "gpt-3.5-turbo", messages = {[role="user", content = prompt]}]),
        response = Web.Contents(url, [Headers=headers, Content=body]),
        content = Json.Document(response)[choices]{0}[message][content]
    in
        content
in
    Output
Azure Open AI function
(Alternative, if you are using Azure Open AI)
let Output = (prompt as text) as text =>
    let
        url = "https://data-prep.openai.azure.com/openai/deployments/textnatlang/completions?api-version=2022-12-01",
        apiKey = "INSERT API KEY HERE",
        headers = [
            #"Content-Type" = "application/json",
            #"api-key" = apiKey
        ],
        body = Json.FromValue ([model = "text-davinci-003", prompt = prompt]),
        response = Web.Contents (url , [Headers=headers, Content=body]),
        content = Json.Document (response)[choices]{0}[text]
    in
    content
in
Output
Using ChatGPT on actual data
Finally, to enrich some actual data with a new column using ChatGPT, repeat the following steps:
Go to some data of yours (preferably only a few rows)
Add a new column with the “Invoke Custom Column” button.
Pick the ChatGPT function. Just start out with some static text.
Modify the text to your desired prompt, including data from your dataset as referenced column. (See example)


And voila! ChatGPT-generated text based on row-by-row data!

Use-cases and limitations
Let’s start with the limitations, because there is one big limitation:
Speed 🐌
Calling the API repeatedly is extremely slow even for a few hundred rows - let alone a few thousands.
Partially because the API doesn’t just have to retrieve data but actually generate it, but even more so because Power Query forces it to run one API call at a time with no support for parallelization. So we really can’t use it for large datasets.
Another limitation is the lack of consistency. Every time a model is refreshed any ChatGPT outputs will be re-prompted and the output will vary from time to time.
I haven’t yet landed on proper production-worthy use-cases, but are currently dabbling with exploring its capabilities around data quality summarization. Check out these not-so-perfect examples:

Column-level data quality summary
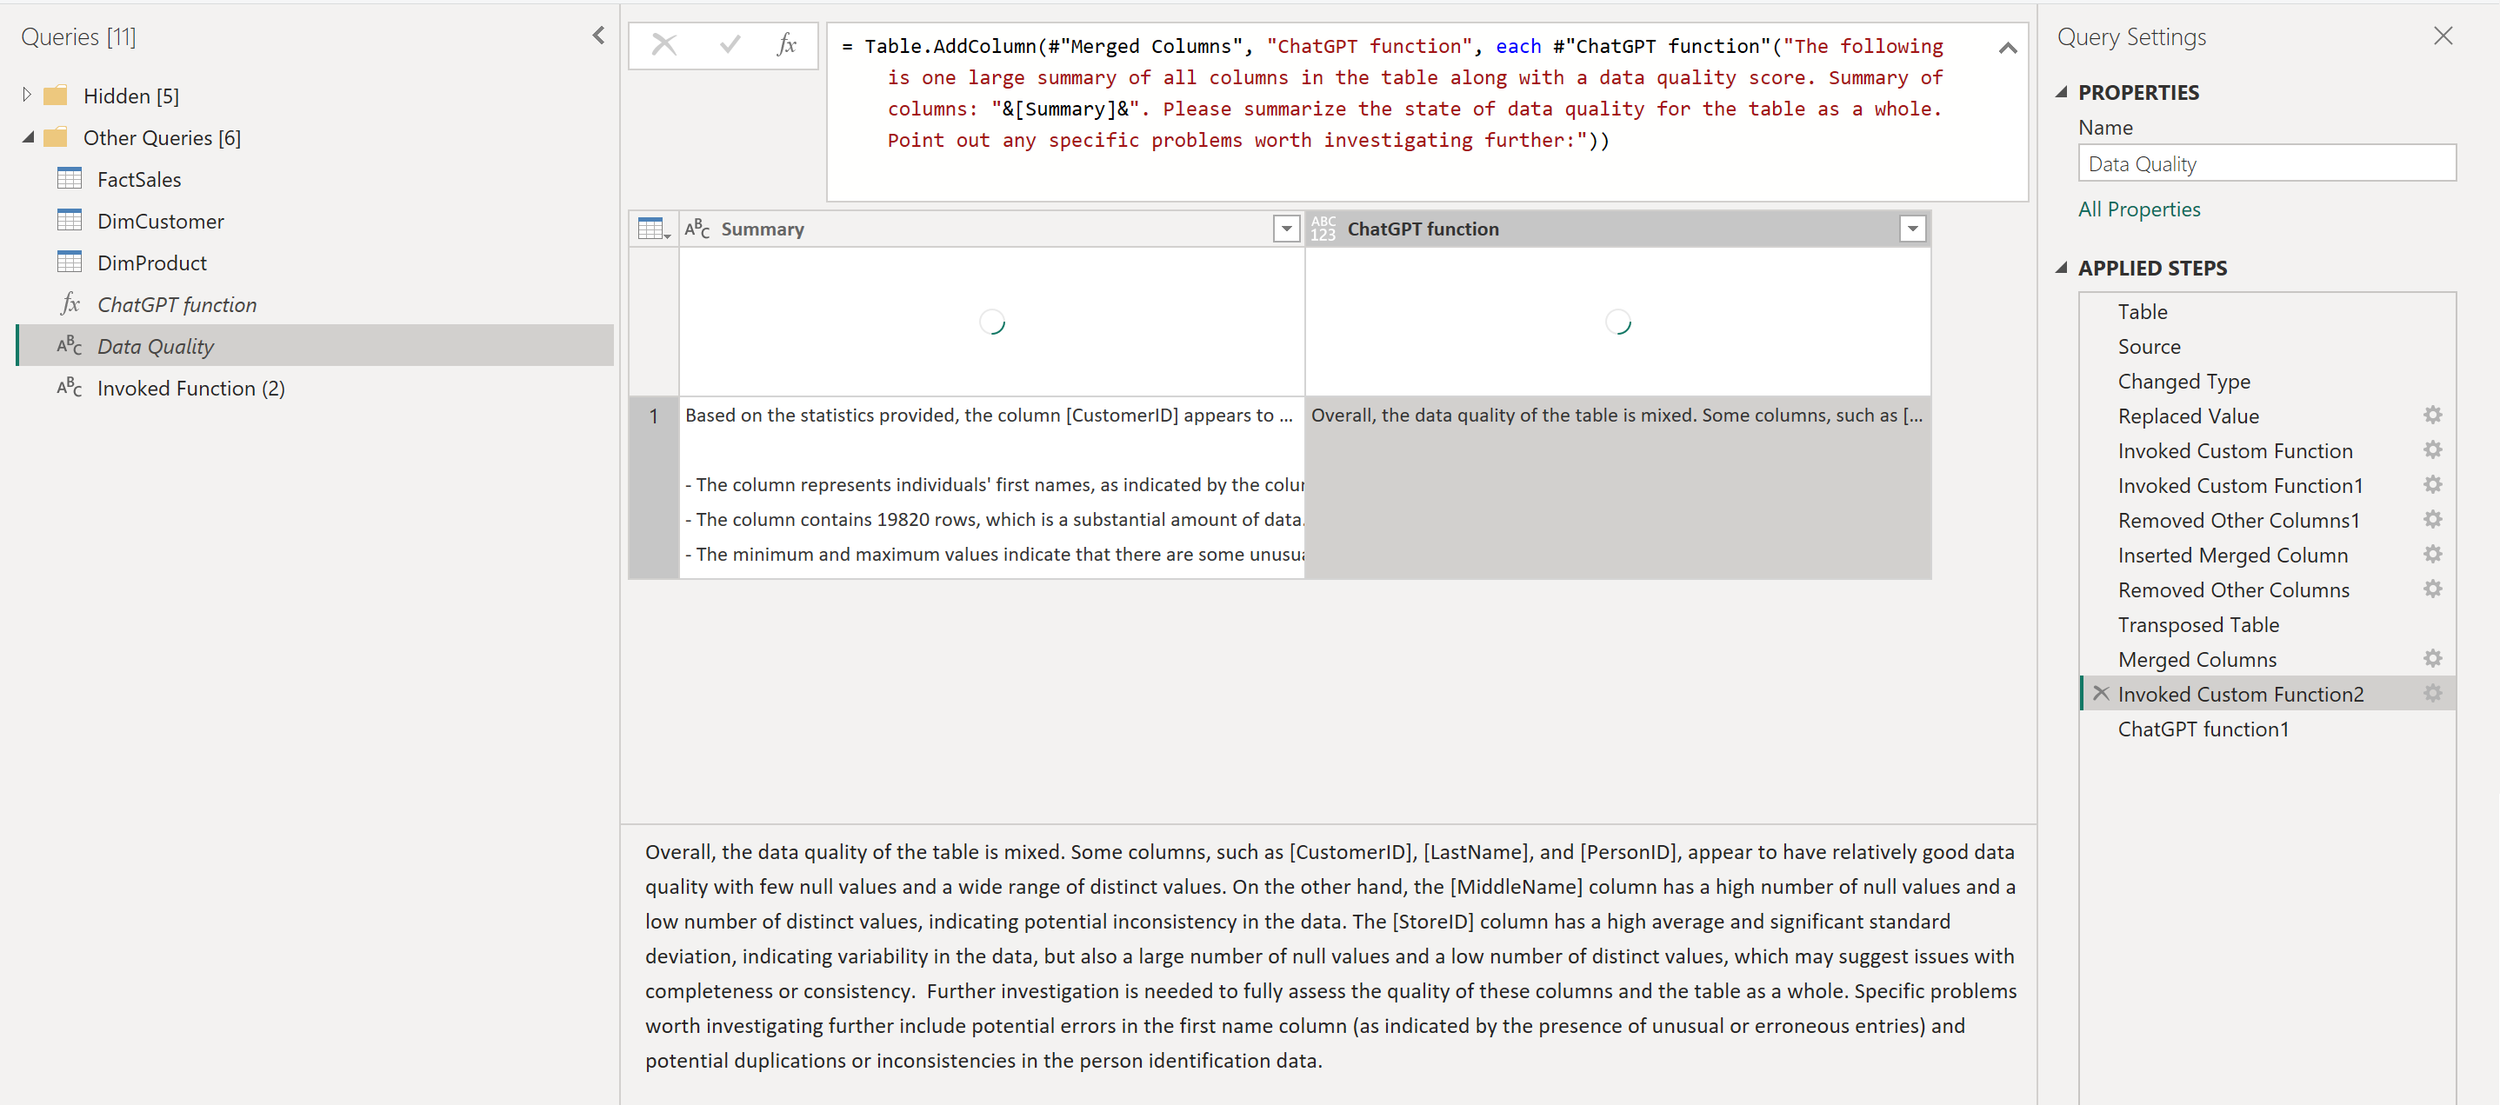
Table-level data quality summary